🌀 Render adventures 2: progress!
Adding a preview window to my CPU path tracer.
4 minute read
Jump to heading In the last episode of ...
In my previous post, I talked about how I created a physically-based CPU path tracer in Rust from scratch. It was a good start, but one of the limiting factors while developing it was iteration speed. Each time I modified the scene or changed some parameters, I had to wait a few seconds or minutes for it to generate a result and then look at the image file it generated.
From what I've seen, all the serious renderers have some sort of interactive viewport. This feature is something I really wanted to implement in my renderer and so I finally took the plunge.
Jump to heading I have the power of wgpu and winit on my side
I figured that to get a realtime, progressive viewport going on, I needed to have some windowed application and have that render a texture that gets updated in realtime. The path tracer would then continuously render its output to this texture.
After a bit of investigating I landed on using wgpu-rs for the rendering.
💡 wgpu-rs is a graphics API written in Rust that provides an interface to the WebGPU API
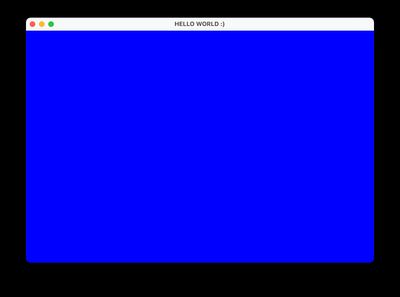
For the windowing itself, I used winit. It was fairly easy (with some tutorials) to get a basic window going and render (boring) pixels to the screen.
Jump to heading Continuous texture updates
This is where the real fun began. It took me a while to figure out how I could efficiently and continuously update the buffer that I was rendering to the screen. Ultimately, I got it working by using Queue.write_texture to schedule a write of some data into a texture every frame. The input for this data was of type Vec<u8>.
let width = 100;
let height = 100;
let mut buffer = vec![0u8; width * height * 4];

self.queue.write_texture(
    self.output_texture.as_image_copy(),
    &buffer,
    ImageDataLayout {
        offset: 0,
        bytes_per_row: Some(4 * dimensions.0),
        rows_per_image: Some(dimensions.1)
    }
    // ...
);
I am note sure about the performance of doing this every frame, and maybe there is a better way to do this. However, since the documentation had this to say:
📖 This method is intended to have low performance costs. As such, the write is not immediately submitted, and instead enqueued internally to happen at the start of the next submit() call.
I figured that this was a good starting point, and it looks smooth enough. Here you can see me continuously updating the frame buffer using queue.write_texture.
Jump to heading Async adventures
Now that I could continuously update the frame buffer, the next step was to link it up to the path tracer I had already made in the previous post. The plan was as follows.
- Spawn a new thread and let the path tracer render into a Vec<f32> buffer
- Let the wgpu-side pull data from this buffer every frame
- Update the output texture using this data
The challenge here is that the path-traced rendering calculation should happen on a different thread than rendering the realtime progressive view. This would allow the CPU path tracer to do its thing independently of the GPU viewer, which pulls data from the CPU-generated buffer.
To make this work, I make use of Rust's RwLock and apply it to a target buffer. The documentation has the following to say.
📖 This type of lock allows a number of readers or at most one writer at any point in time.
The code looks roughly like this.
let handle = thread::spawn(move || {
    let mut sample = 0;
    let total_samples = settings.total_samples;

    while sample < total_samples {
        buffer.
            .par_chunks_exact_mut(4)
            .enumerate()
            .for_each(|(index, pixel)| {
                let mut radiance = Vec3::zero();
                let view_ray = camera.generate_view_ray();
                radiance = integrator.integrate(view_ray);

                // accumulate radiance
                pixel.r += radiance.x;
                pixel.g += radiance.y;
                pixel.b += radiance.z;
            });
            sample += 1;
            render_target.try_push();
    }
});
Jump to heading Next steps
Now that I have a windowed application where I can see the progressively updated output of the path tracer, I can get back to working on the path tracer itself.
I really want to turn this project into a more complete renderer with an interface, path tracing on the CPU + GPU and many other features. The next steps will be to clean up much of the code, and to add a testing framework to verify the correctness of my path tracer. I will document my progress through these blog posts.
Jump to heading Additional Resources
Jump to heading wgpu
https://sotrh.github.io/learn-wgpu/